Foreword
I don't know when I started to feel more satisfied with film cameras than digital cameras. Perhaps it was because in those days when camera manufacturing was still underdeveloped, every camera was a combination of the craftsmanship and sweat of the camera maker. Purely mechanical SLR cameras always fascinated me, and every time I got a new film camera, it would always bring me new surprises.
As an enthusiast who has been in contact with film cameras for quite some time, holding an old camera in my hands with all its vicissitudes, every time I press the shutter, I feel like I am communicating with the maker of the camera decades ago across time and space.
Modern cameras have evolved rapidly, with higher shutter speeds and faster flash sync, all thanks to the high-speed updates to electronic chips as well as processors in recent years. Holding a mechanical camera from fifty years ago, I couldn't help but think about what kind of delicate internal mechanics were relied upon inside a body about the same size as a modern digital camera, so that it could perform the functions of a modern digital camera. And during my long time playing with cameras, I happened to find an opportunity to completely disassemble a mechanical camera and get a deeper understanding of the inner workings of a mechanical camera.
What is Spotmatic
 Spotmatic series between 1964 and 1974
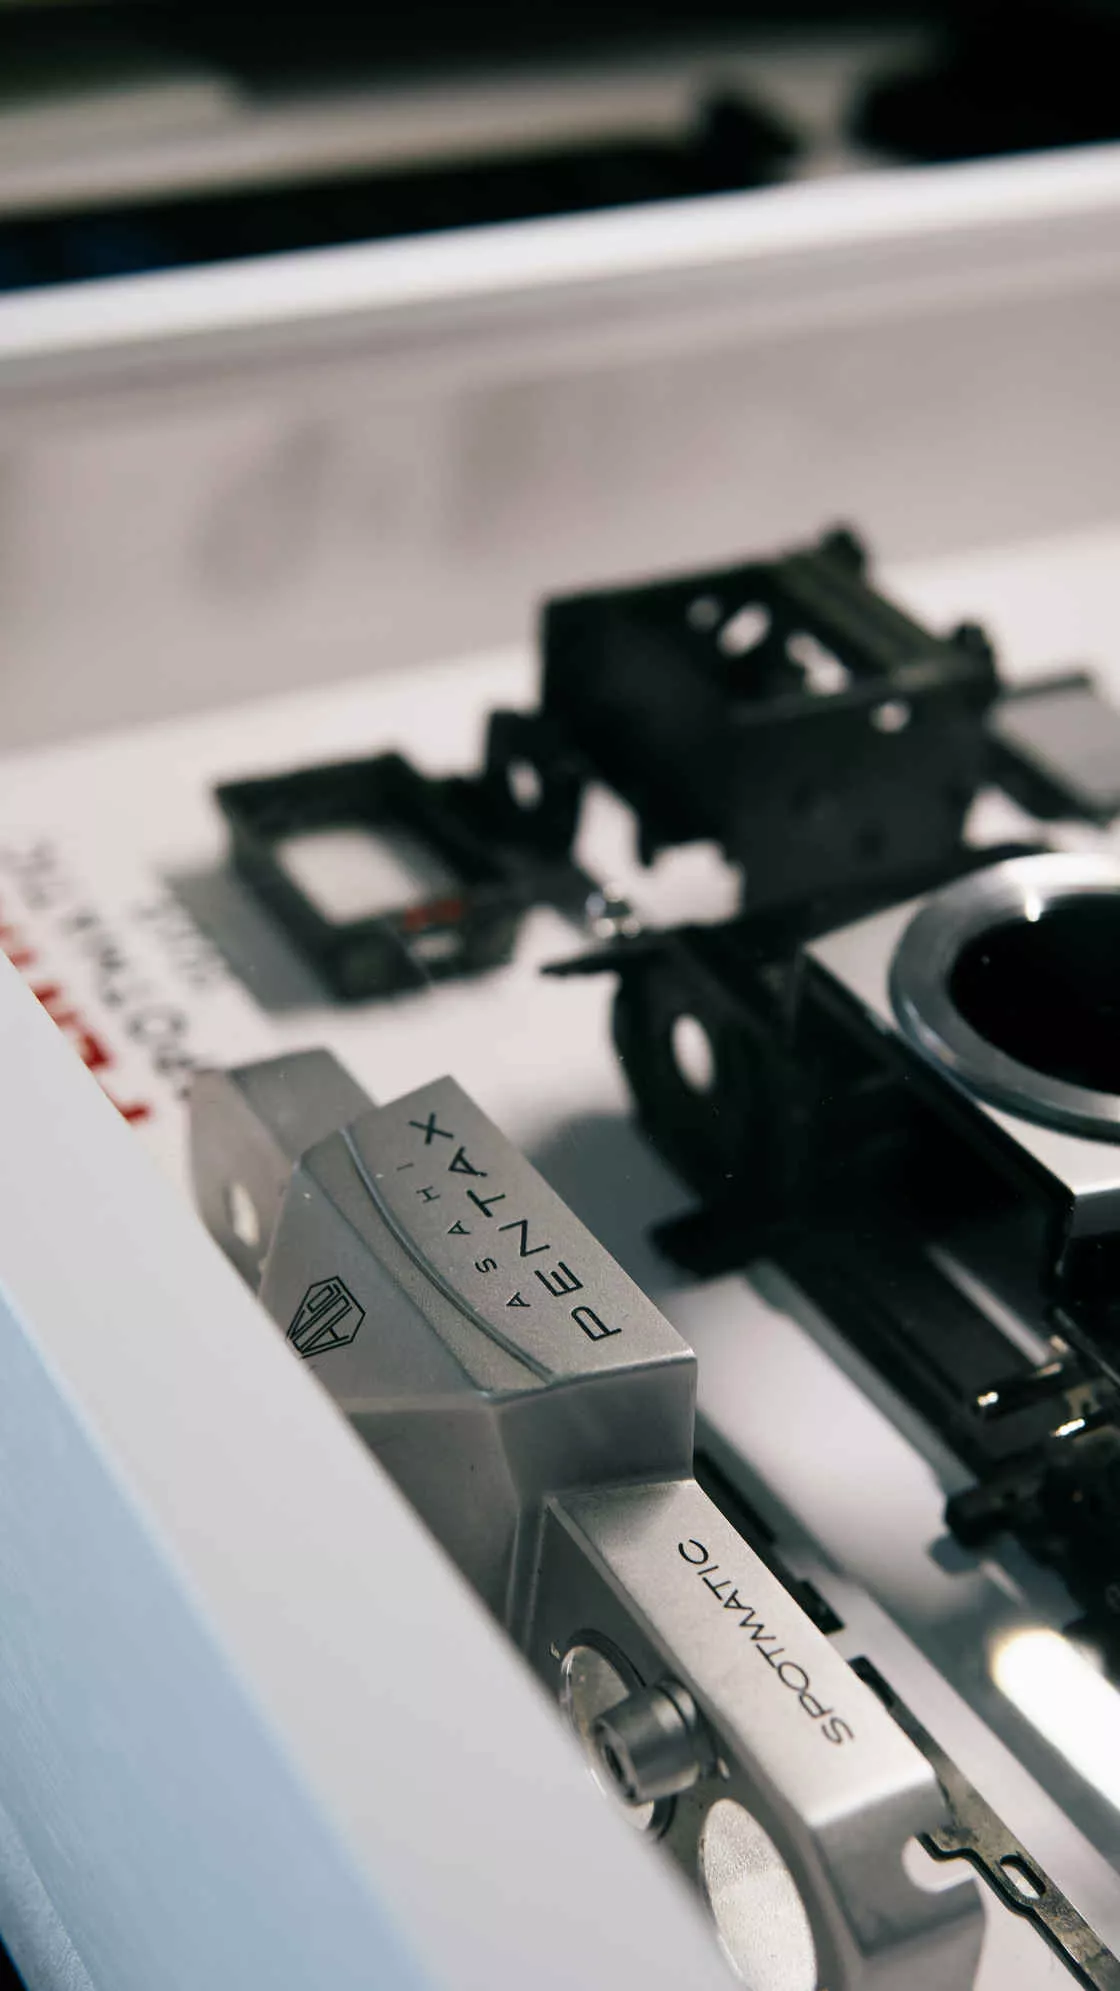
The first Pentax Spotmatic (hereinafter referred to as Pentax SP) camera from 1964 was the world's first TTL metering (through-the-lens) SLR camera, and the first model in Pentax's history to record millions of sales. This explains the high market share and low price of the SP today. Because of the Pentax SP's special manufacturing technology, the camera's silver metallic exterior has not changed much over the past fifty years, and even if the parts don't work properly, the machine's high value is ideal for framing.
The Spotmatic was officially released with full open-aperture framing, averaging through the lens (TTL), and a cadmium sulfide (CdS) photoresistor mounted on top of a pentaprism. The Spotmatic announced the birth of a new era in the use of SLR cameras, where the light meter was external or built in but not through the lens. The Spotmatic announced the birth of a new era. To this day, we still base our SLR camera light path design on the Spotmatic of 40 years ago, which has had a profound impact on the development of future SLR cameras.
The launch of the Spotmatic announced the birth of a new era. To this day, we produce SLR cameras with a light path design based on the Spotmatic of 40 years ago.
In fact, the Pentax SP in M42 mount alone is not very well known, on the contrary, the lens that comes with it should be familiar to everyone Pentax Super-Multi-Coated Takumar 55mm f/1.8
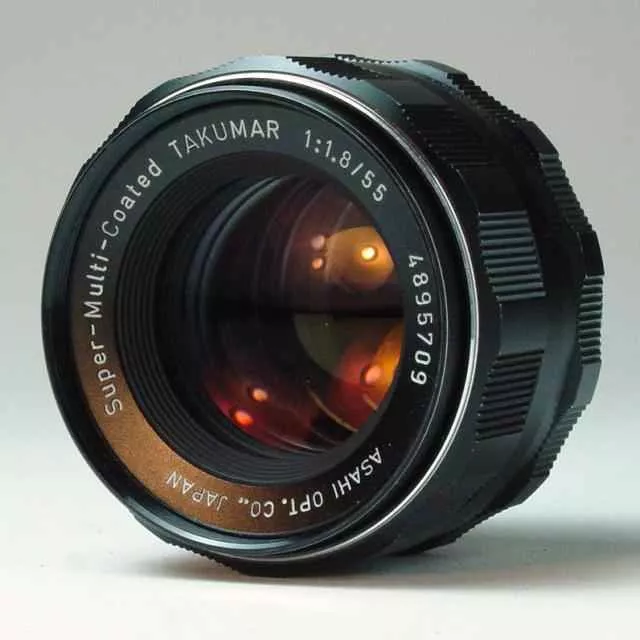 The Taikoma 55mm f/1.8 Pentax Taikoma and Super Taikoma series lenses are still a sought-after item among older lens players decades later. The sharp in-focus, illusory out-of-focus, and oily colors of the Taikoma line of lenses brought recognized acclaim, and the coating technology of this line of lenses is still excellent today and has the advantage of being inexpensive.
Asahi Pentax as a company no longer exists, and many people today don't even know there is a Pentax brand, even though it was once so brilliant.
The Pentax SP I have was acquired a long time ago, manufactured in 1969, and has been sitting on a shelf as a display because I found a crack in its viewfinder pentaprism. It was only on a whim one day last year that I purchased another parts machine with a faulty shutter and got this Pentax back in good shape. And the finished parts machine was just enough for me to completely disassemble it, put it in a frame, and frame it while learning about its fine construction.
It actually took almost a small amount of time before and after to take this film camera apart, straight from winter to summer.
Since I don't have a lot of experience in taking apart cameras myself, I had to turn to my fellow minority author with a lot of DIY experience @PostMeridy. At the time, I thought it was very simple: Ama had a complete set of tools to take apart a phone, so I didn't have to buy any tools to take the whole camera apart and then it would be done. But it turns out I was very wrong.
It was during the teardown that I realized that the whole process was less like interacting with craftsmen from years ago and more like wrestling with them.
Difficulties encountered in dismantling the camera
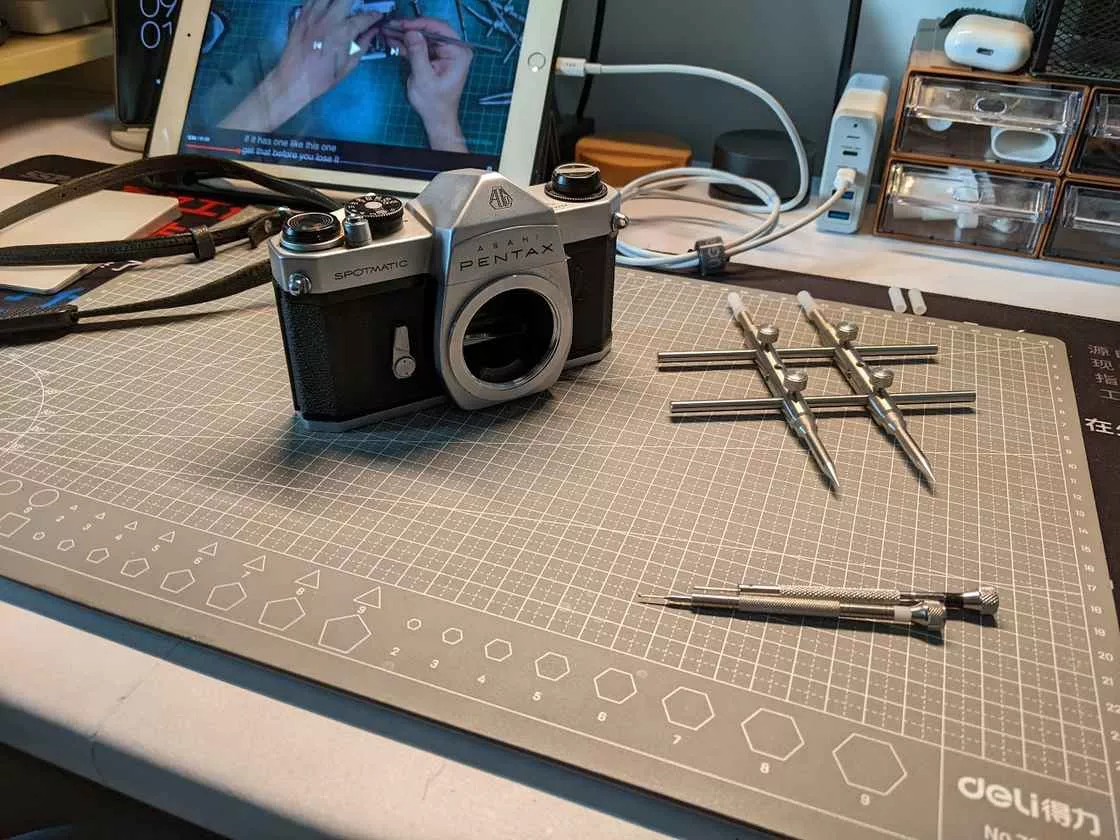
Tools are hard
Everything is difficult at first, and when the two of us finally found a common gap and were ready to start disassembling immediately on the first day, we ran into the last problem we wanted to encounter when disassembling something: the
- The existing screwdriver in hand is not precise enough
- Some special parts require special tools for disassembly
After we started to do it, we realized that the 2.0mm screwdriver in our hands could only remove two screws on the camera's housing, but it could not do anything for those fine screws inside, which are comparable to watch parts, so we had to put it back temporarily, and temporarily purchased a set of precision screwdrivers with 0.8mm~1.6mm tips on a certain treasure. After a long wait, just when we think everything is fine, set up the equipment to start, the accident once again uninvited.
 Couldn't get the top cover off so I went to work on the bottom cover
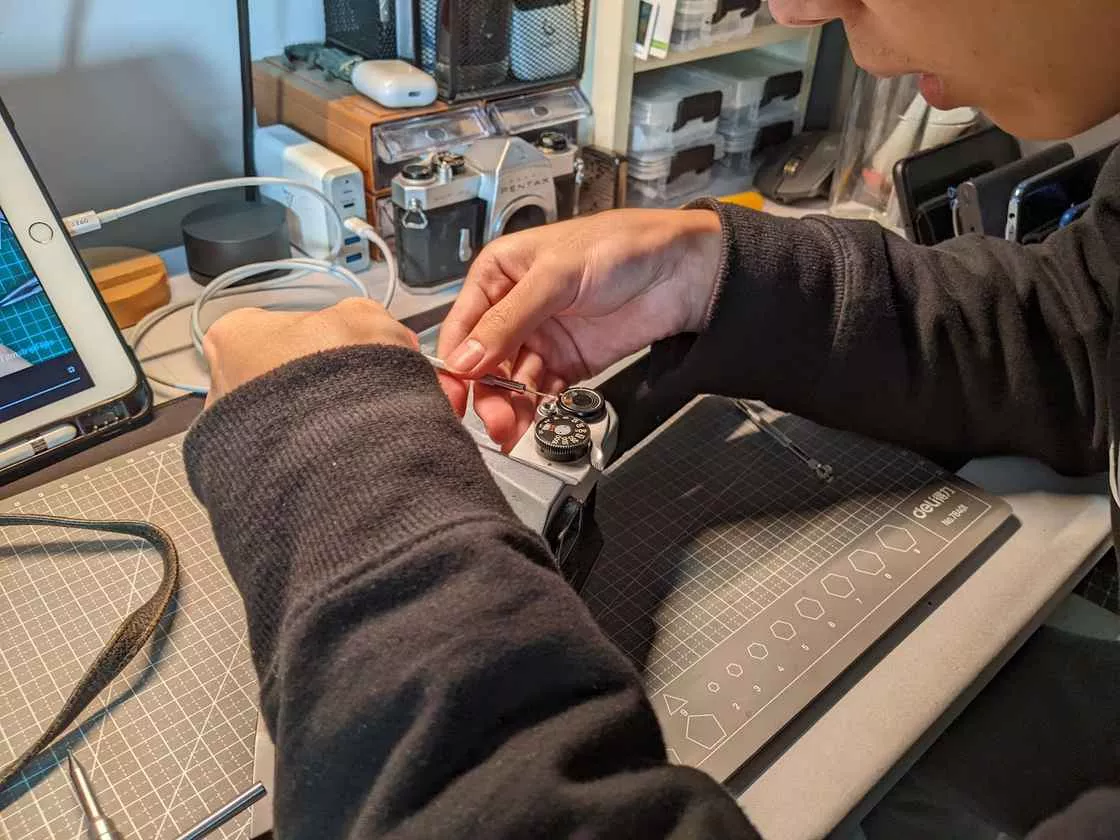
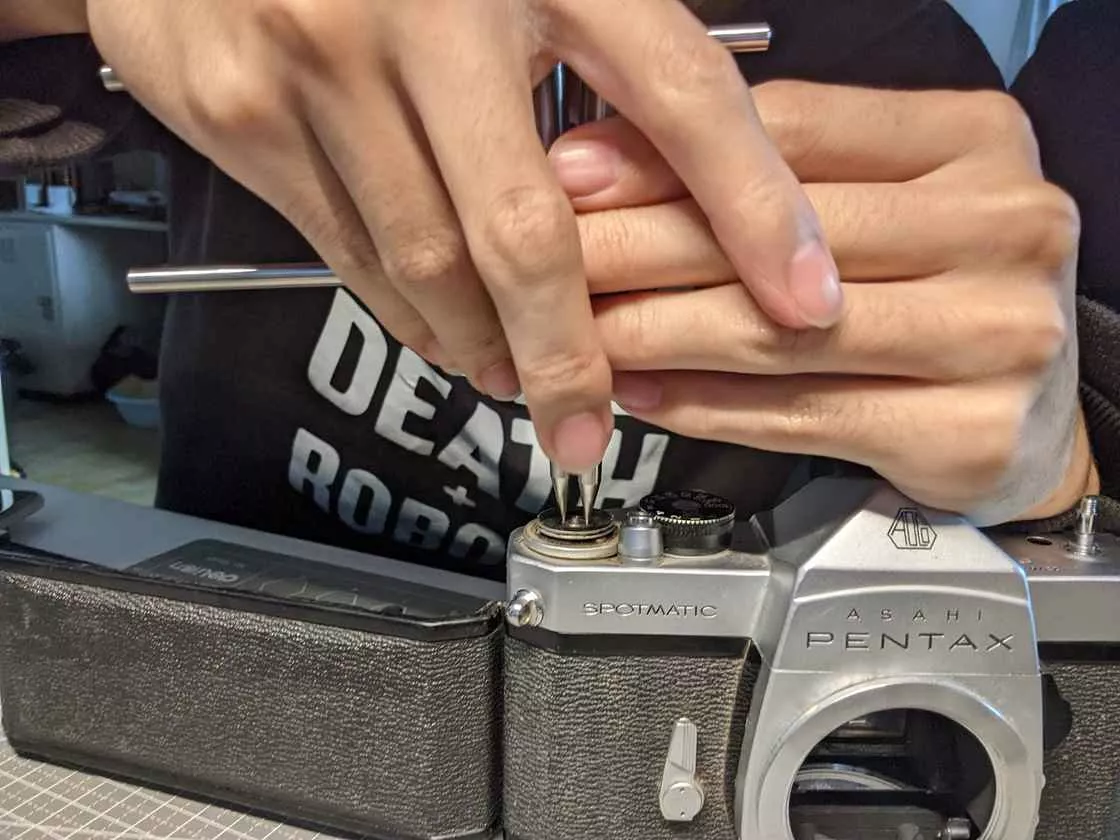
We couldn't even get the two dials on the camera that seemed easiest to remove because the 0.8mm screwdriver still wasn't precise enough - after continuing to shop for a set of screwdrivers that we'd never use again in our lives and waiting a long time for delivery, we finally, in response to a handful of YouTube teardown videos Removed the dust cover from the camera's overhead handle and counter dial.
 Just when we thought the disassembly would get easier after that, the fire of excitement was immediately doused when the Youtubu blogger pulled out a tool we didn't recognize which was immediately doused afterwards.
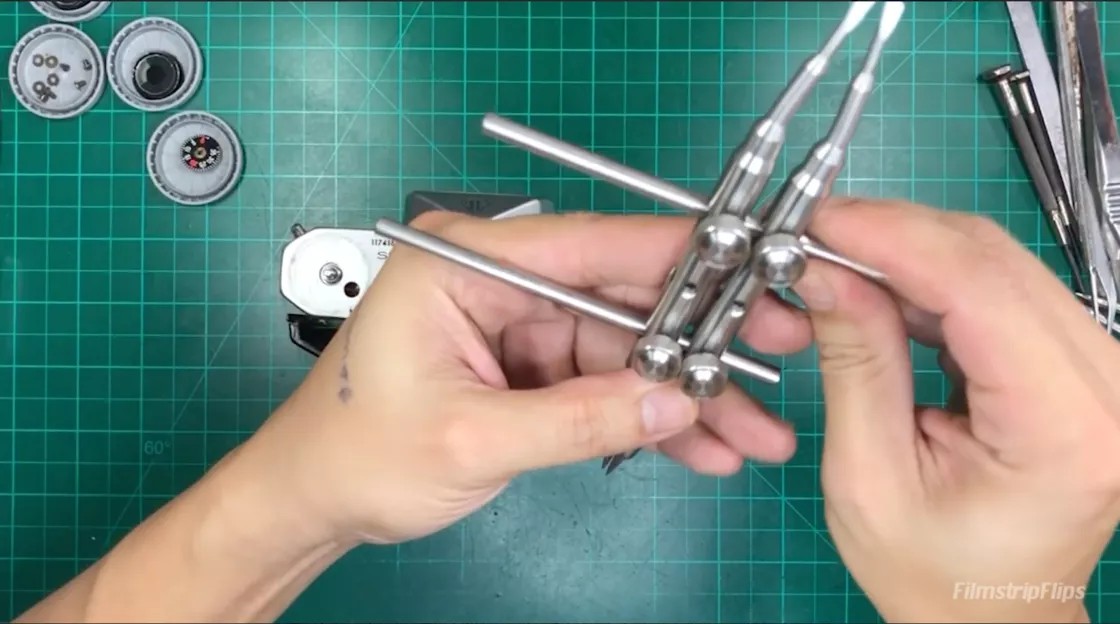 When I first saw it, I didn't even know what keywords to search for|YouTube: FilmstripFlips A little bit of picture writing After a few words, we finally learned that the tool used to remove ring-shaped parts such as lens compression rings is called a "Tic Tac Toe Wrench", which also has a very descriptive English name: Tic Tac Toe Wrench, which is the wrench in the shape of a tic-tac-toe that draws circles and lines.
 After trying for a long time to remove the part by stabbing it with tweezers, screwdrivers, and various messy clay things without success, we had to buy Two sets of tic-tac wrenches. And just like that, while waiting for the well wrenches to arrive, a month had passed since we started taking the camera apart, and we hadn't even taken the top cover off the camera yet.
 Finally the tools arrive
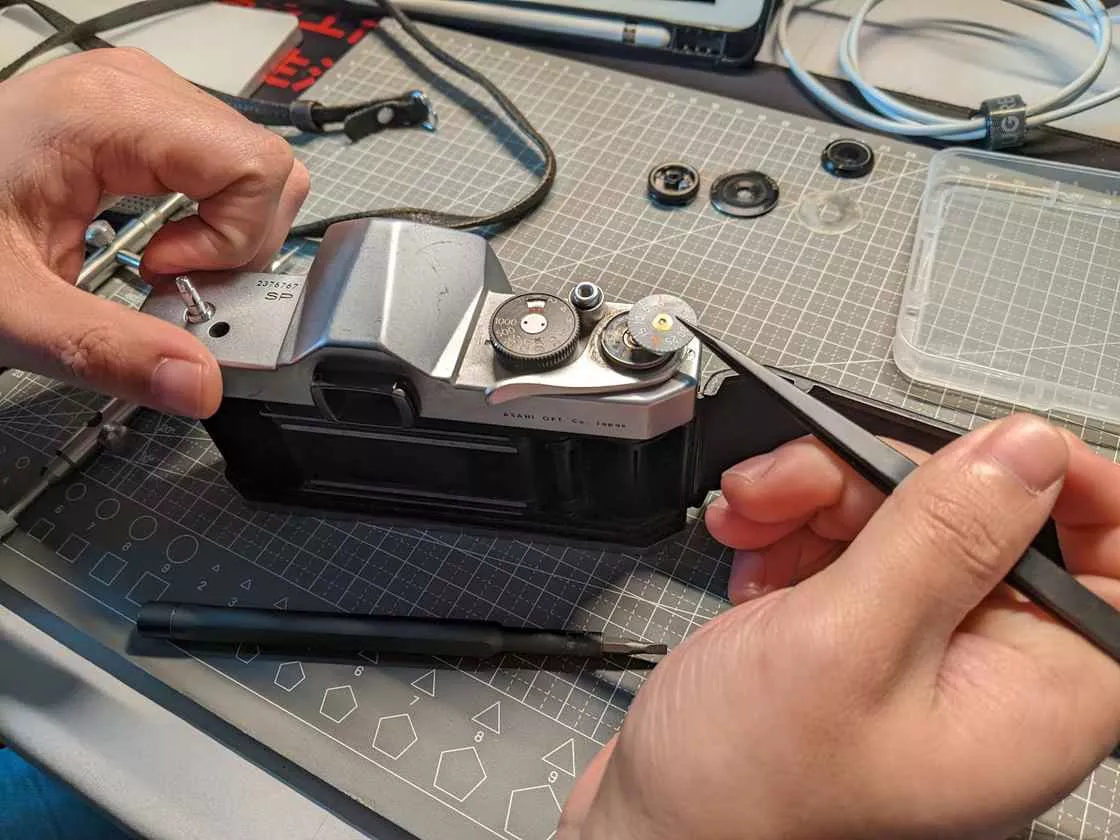
Needless to say, a job like disassembly really tests a disassembler's attention to detail, and as we continued to rejoin the fray, we actually discovered that we bought the wrong model of this well wrench because of an oversight on my part, not noticing that the model number in the video was the curved well wrench, and I had bought the vertical kind directly. Just this small oversight of detail caused our model of well wrench to close the gap between the two posts to the minimum actually fail to match the two holes on this particular part. But by our strong and direct means of discarding the "two" part of the tic-tac wrench and merging the "DYNAMITE|" part directly, this part was finally solved, and then as we did, we managed to open the tops of both cameras.
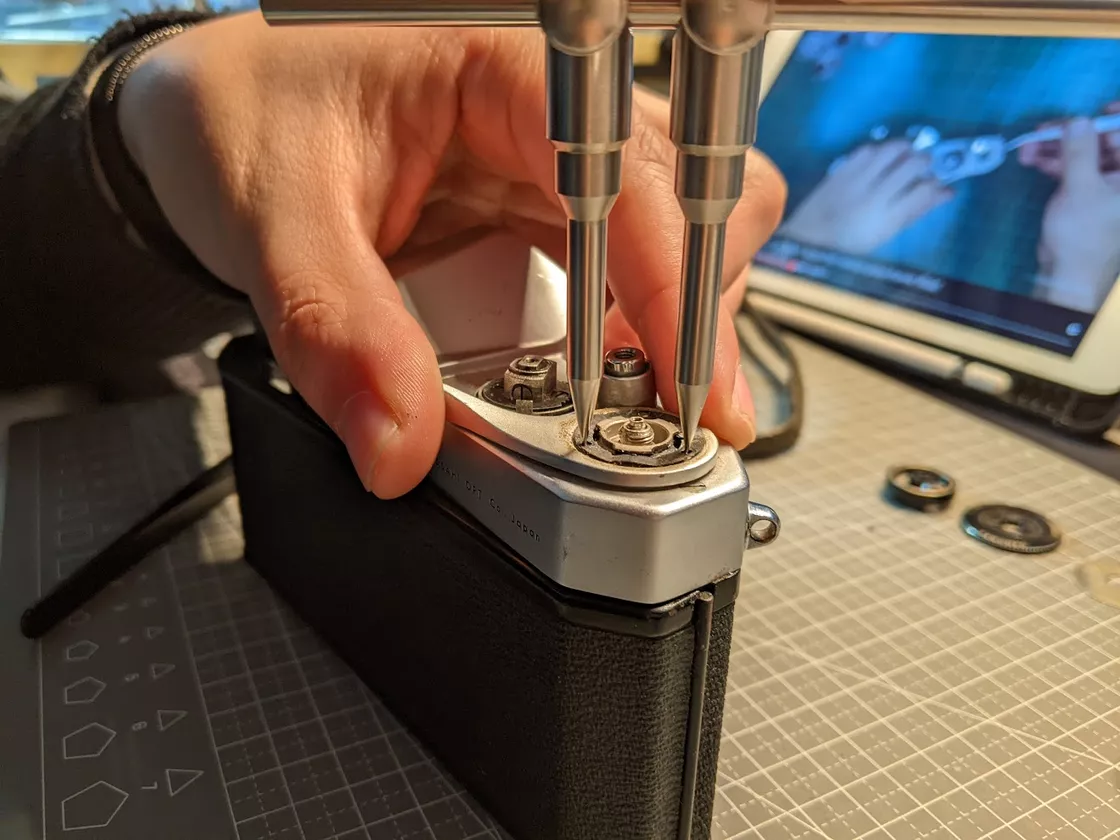
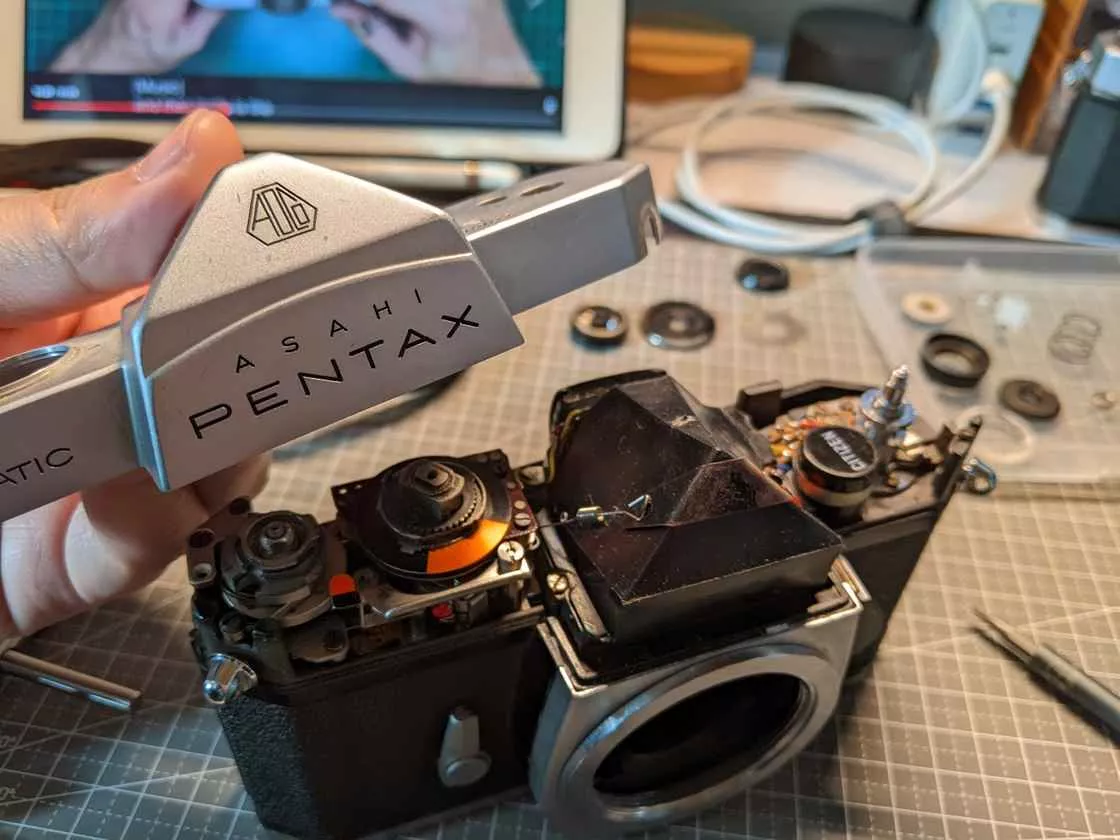
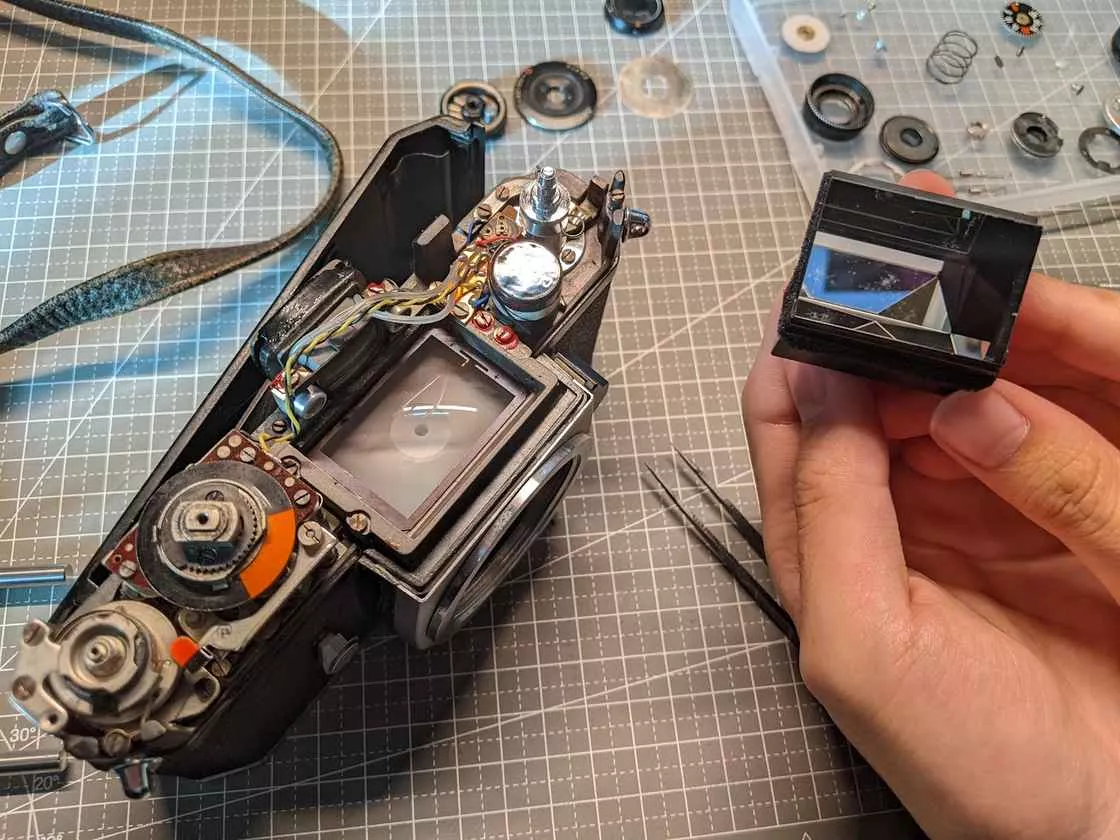 The next step was to complete my initial goal - to replace the damaged pentaprism , but the camera's mission was far from over, and it was to face complete disassembly.
 ## Rusty parts
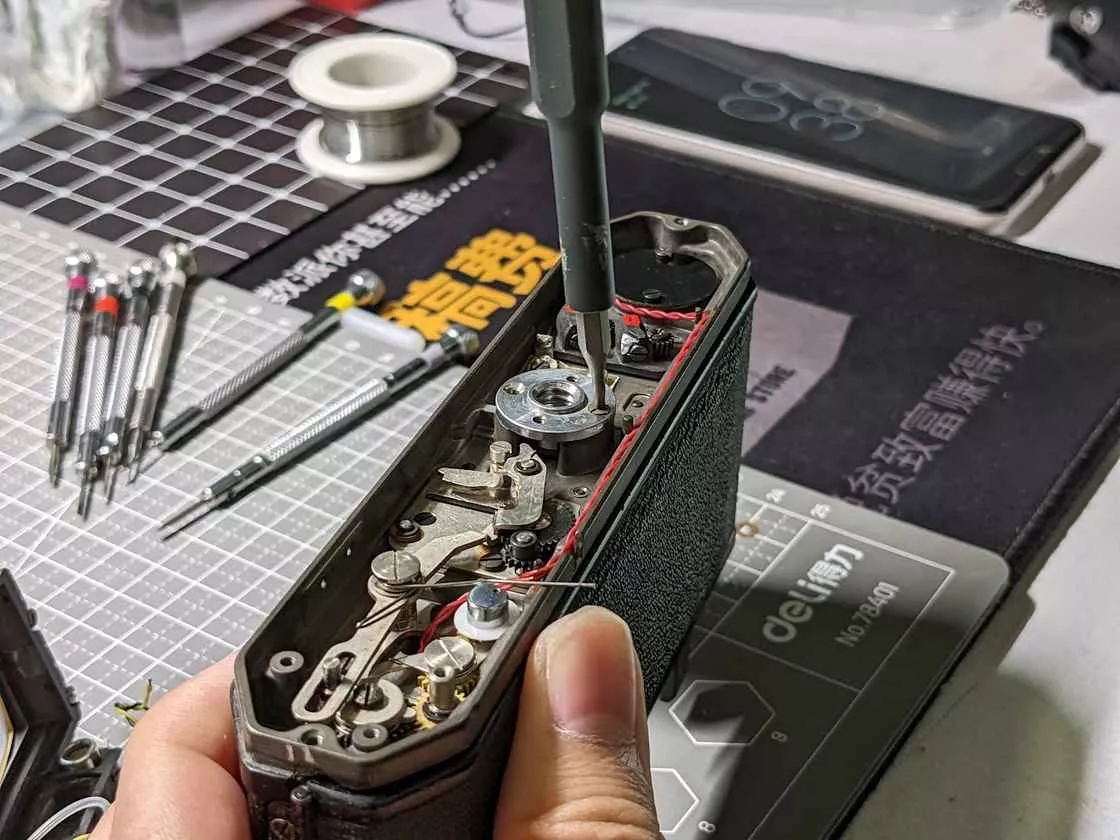
Since the camera is decades old, rust is inevitable in the screws and considerable care should be taken when handling these screws.
When we uncovered the trim on this camera, we found that the screws underneath the trim were so badly rusted that they stuck to the body and could barely turn, and the rusty screws had slipped out of their threads before we even started to screw them in very hard.
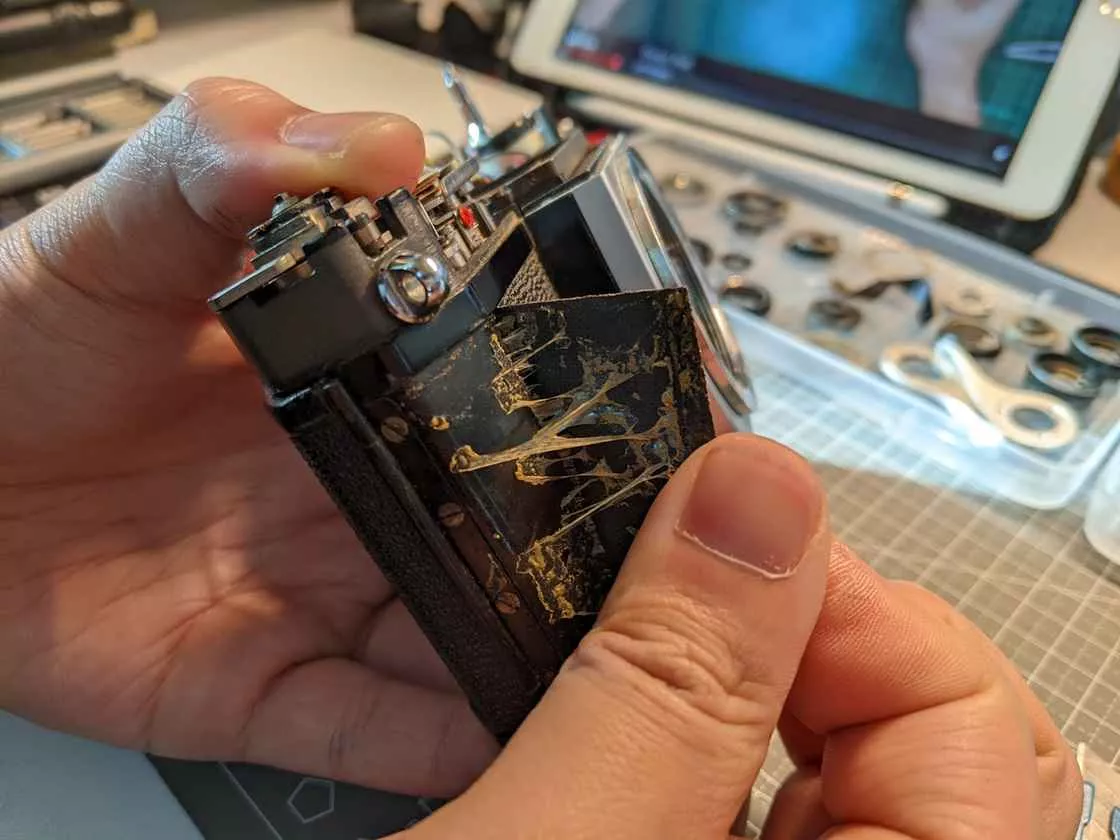 But luckily for us, after consulting various methods of dealing with slipped screws to no avail, we managed to confront the already slipped screw with just A simple drop of a small amount of alcohol combined with Amar's strong hand power managed to screw the rusty screw down hard.
 Expression management failed
Here are a few quotes of trivia, and if you are unfortunate enough to encounter rusty screws in the future, here are three normal suggestions to use.
- Using penetrating rust remover and WD-40, allow the reagent to soak into the screw for more than fifteen minutes
- Repeated heating and cooling expands and loosens the screws
- If the screw has slipped, the threaded recess can be carved out by using a small hand drill
The teardown video is not as detailed as it could be
Although aided by YouTube videos, the how-to for taking apart a mid-vintage camera like this, which is owned by only a few, is very abbreviated and limited. The single camera shot allows us to see only the approximate parts of the disassembled parts. Moreover, the YouTube videos mainly focus on repairing the camera, not disassembling the whole camera as we did, so after their repair is over, it's entirely up to you to figure out and try out exactly how to disassemble the remaining parts and the location of the drive shaft.
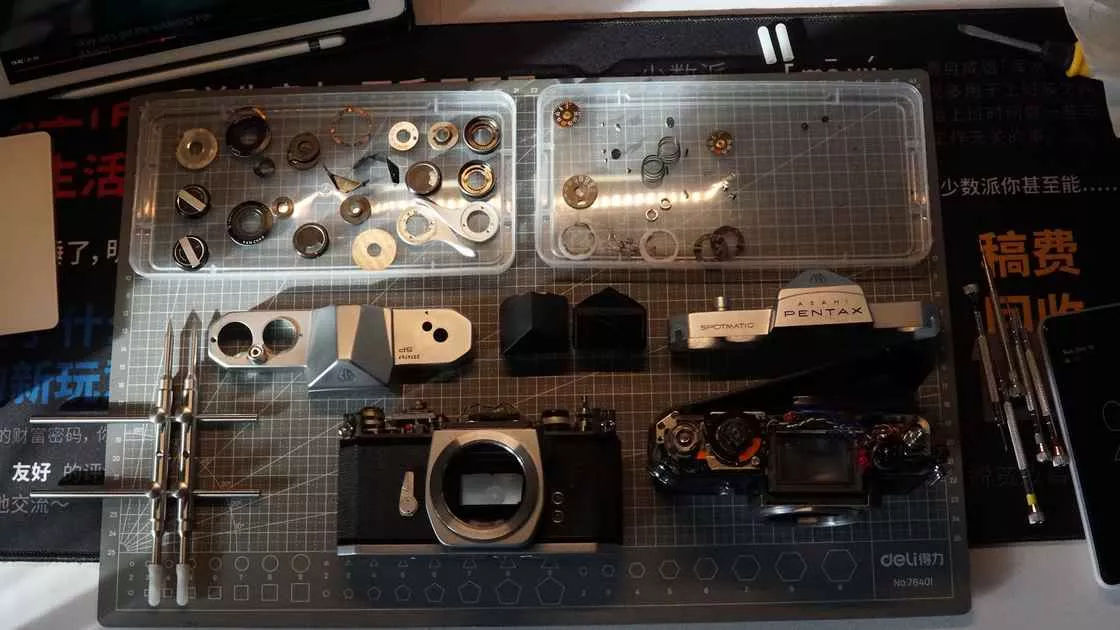
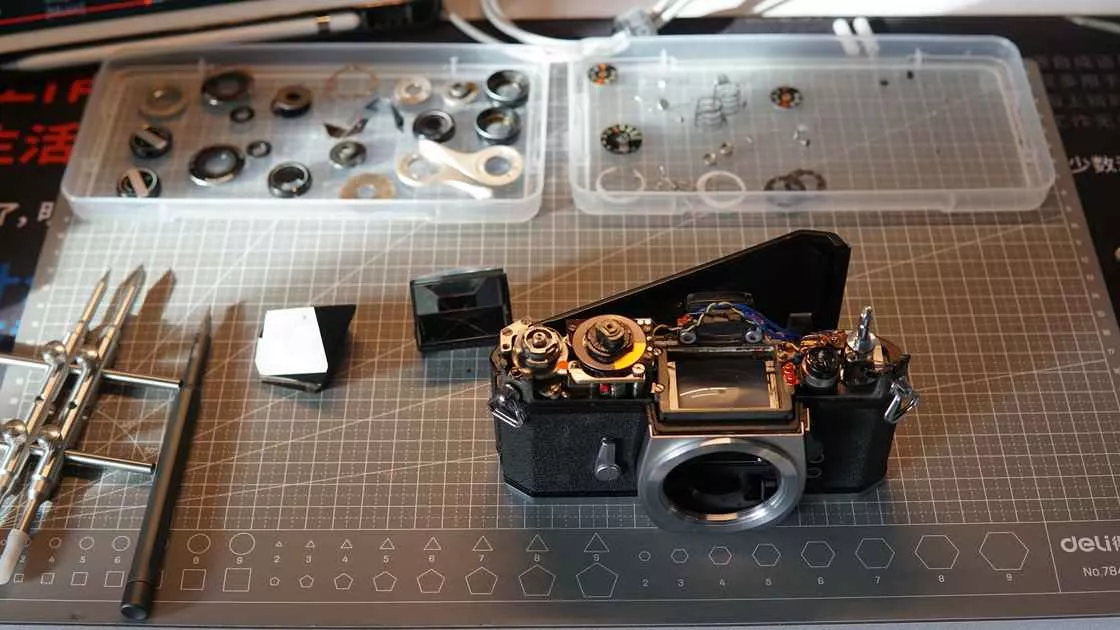
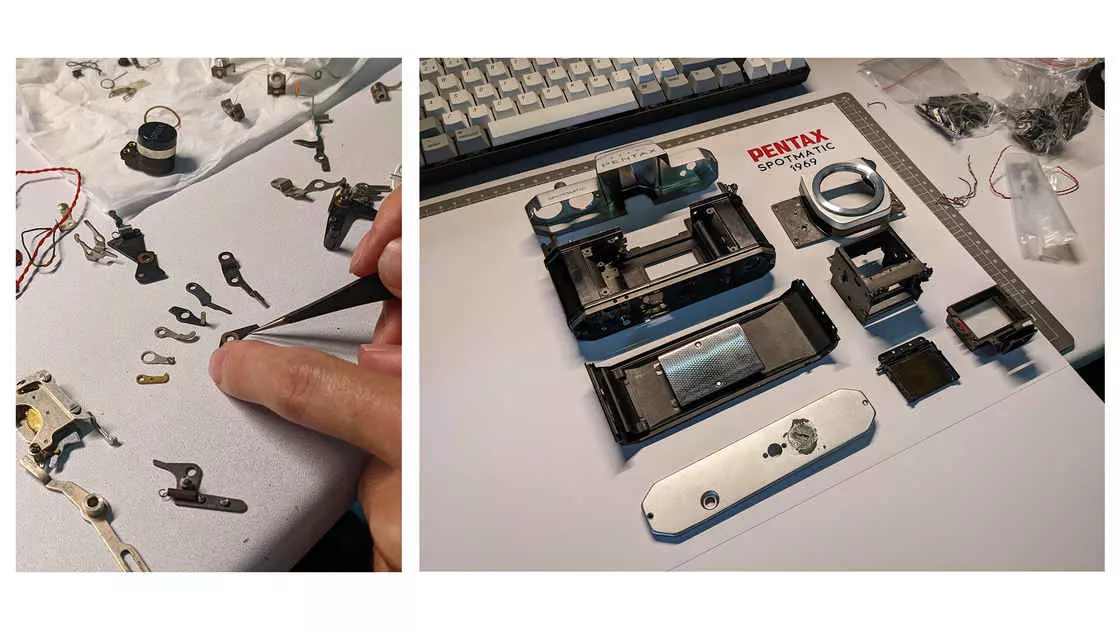
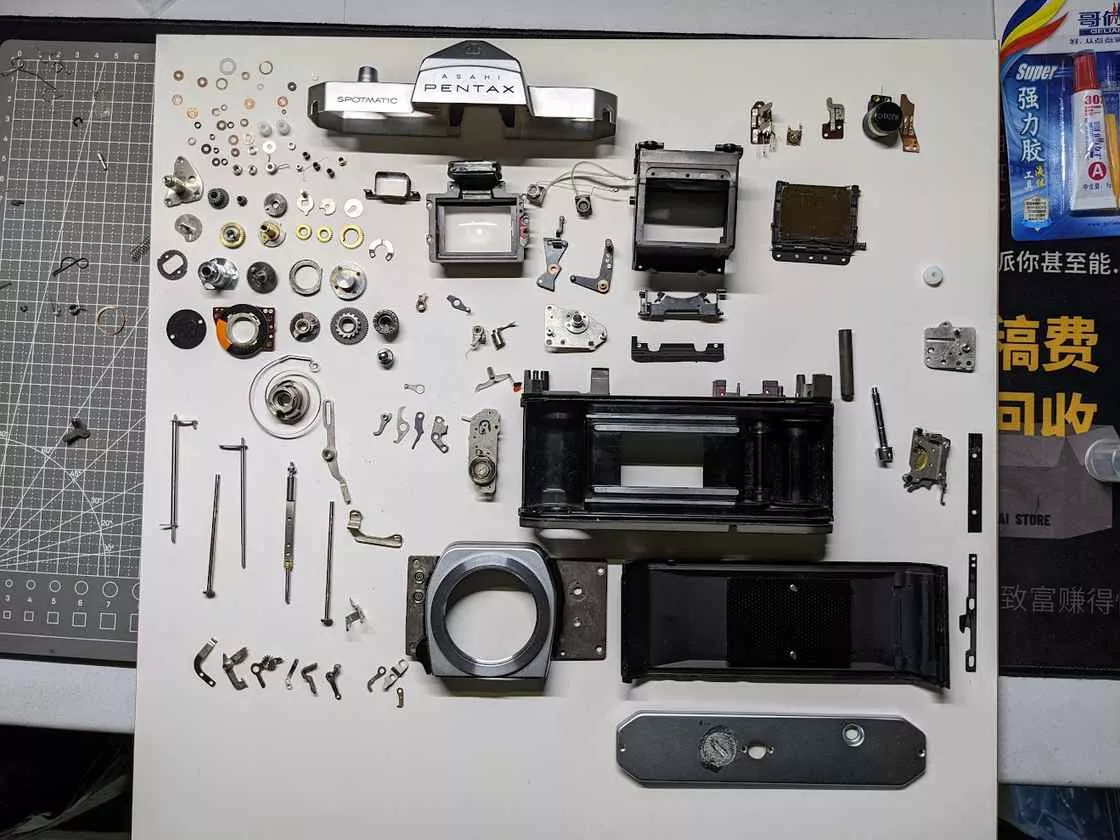
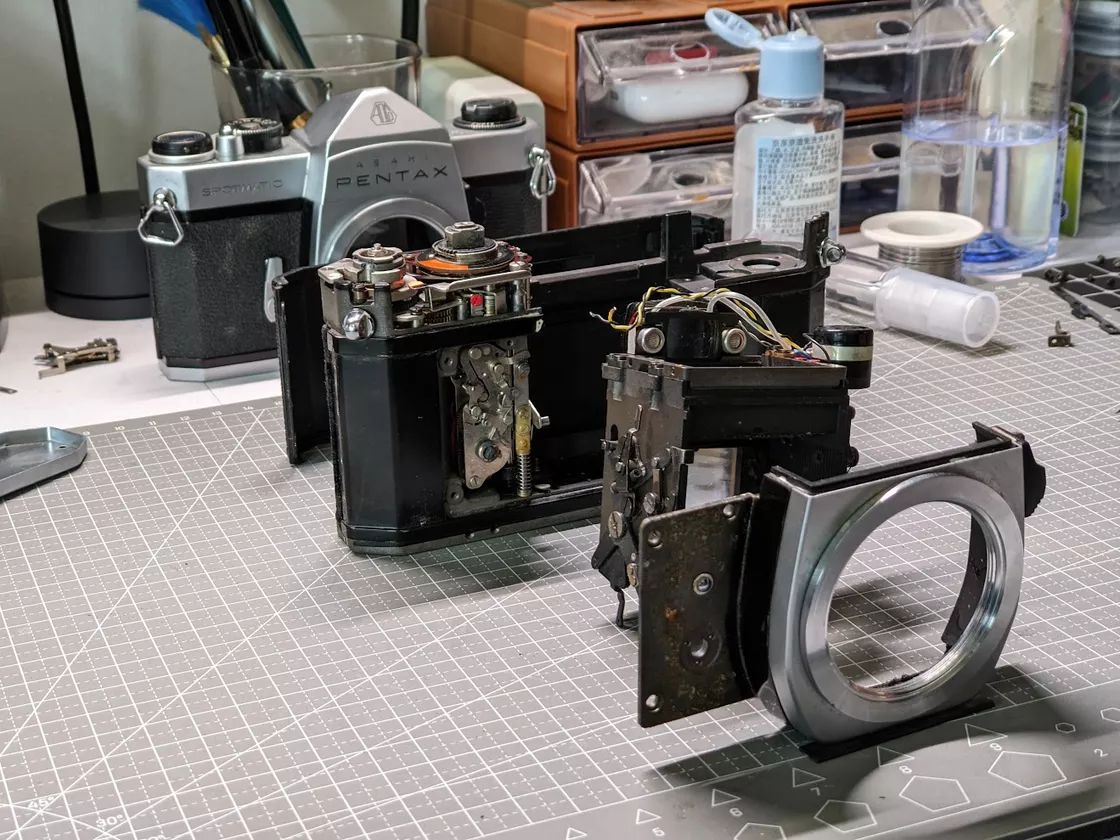 Exploded view (physical)
And when we lose the aid of the video and take apart the parts ourselves, we also feel how the makers and designers back then went to great lengths to hide the camera's screws in all sorts of tight places to keep the whole camera looking perfect and its precise yet compact interior.
 The Beauty of Mechanics
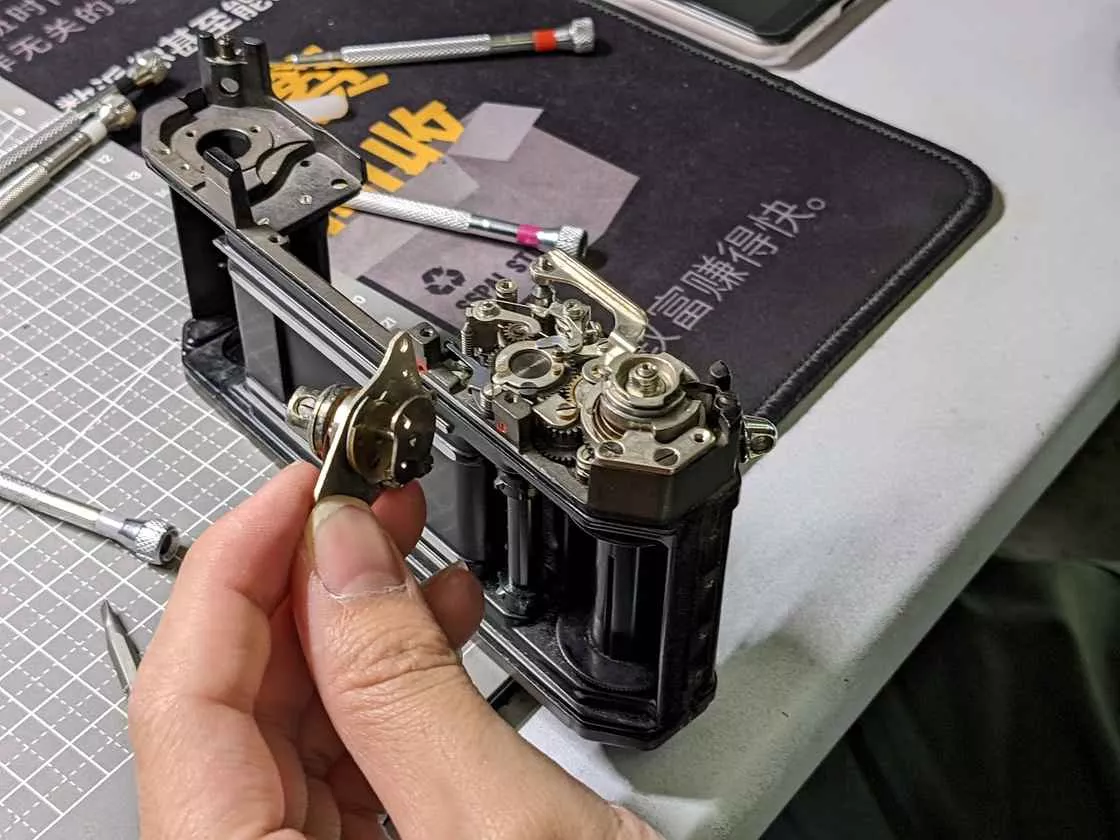
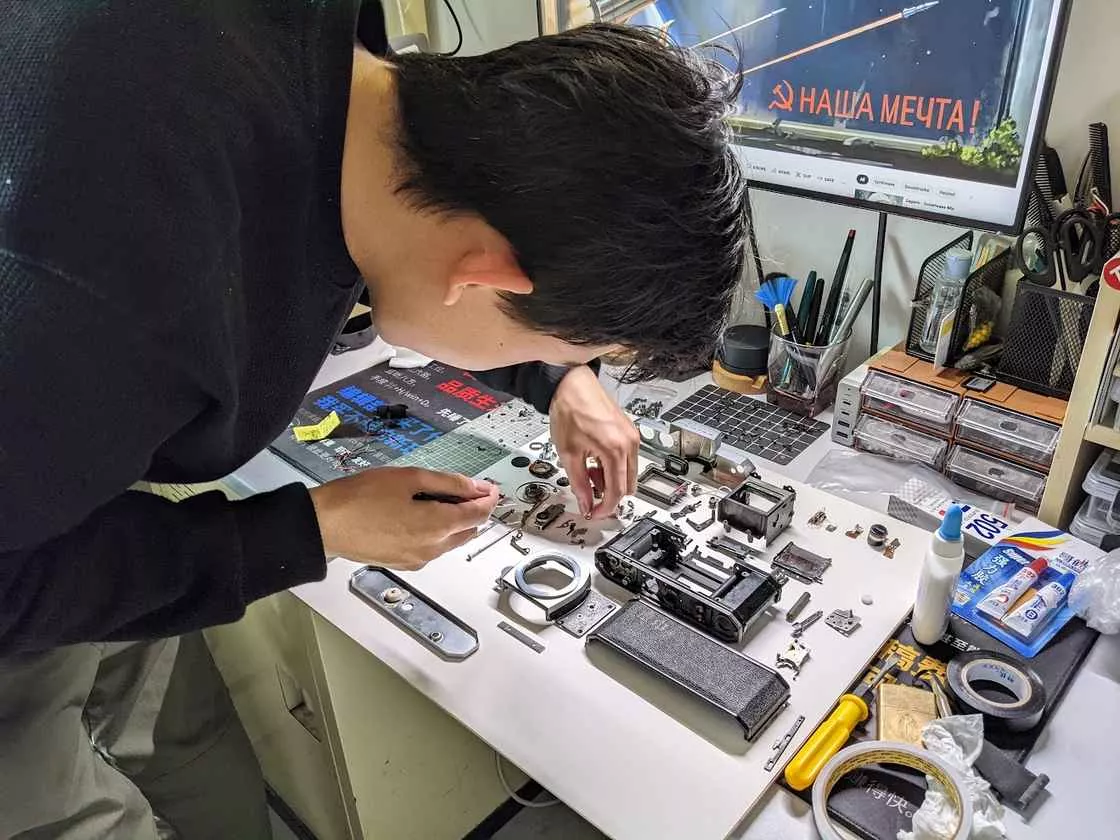
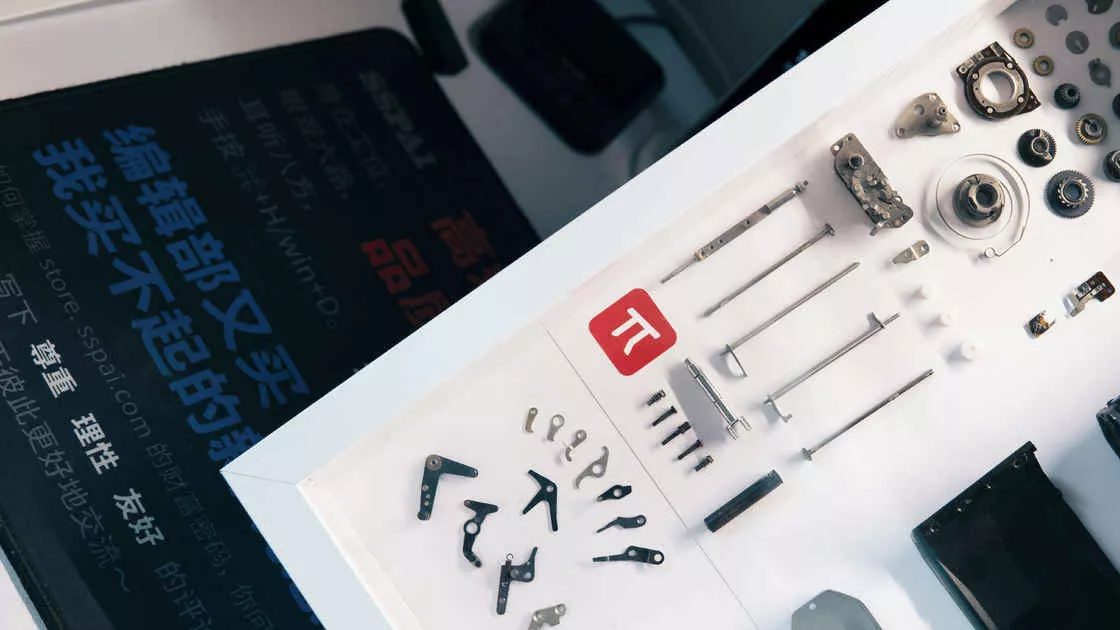
When the disassembly part is 99% complete, it's time to start working on preparing the disassembled parts for disposal.
Precautions when gluing parts
Better make a draft first
The parts of a camera are small and miscellaneous, and to make an aesthetically pleasing mount you need to arrange the parts well in advance. If you don't do a good job of arranging the parts and simply glue them together randomly, it will seriously affect the overall look and feel.
When placing the parts you can select out parts that are similar in shape and bend similarly and try to combine them into a connected whole.
 It's a good idea to have a few extra sheets of backing paper when laying out the parts, as the black lubricant left on the tiny parts can seep into the white paper and cause the paper marks to blur .
I chose a 40cmX40cm frame and did a simple placement of some parts with a good amount of clearance, and found that it seemed a bit difficult to fit all the small parts in, so I had to discard some parts.
! The backing paper selected for [](https://img.16k.club/techlife/2022-06-22/9d70a26604edd2baf03982f36bae5748.webp) is 160g A3 coated paper
)
Also having a few extra drafts makes it easier to determine the best placement of the parts, pick a suitable spot, make sure no one is next to you, and settle down to carefully place the parts with tweezers a few times, because it's really easy to break the defense when you're placing the parts.
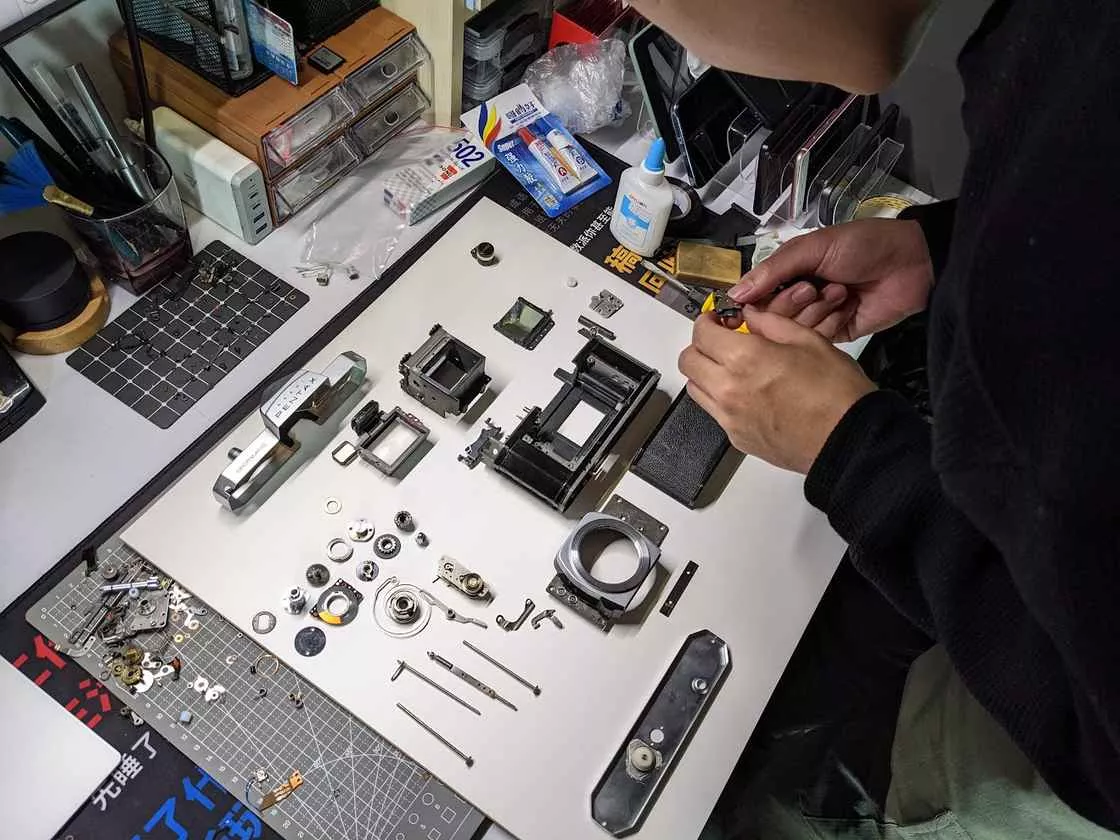
 After several attempts to find the right placement, I was faced with all these parts of different sizes, some of which needed to be held by hand, and when I held them by hand When you hold them by hand, your hands are unsteady, and if you are not careful, you will bump the parts next to you. And when I use tweezers to hold some tiny parts like screws, I often get dizzy and knock the shapes next to them out of place.
Dealing with such multiple parts is like a meditation process, and a bit like a practice, and the purpose of the practice is to keep these parts steady and stable in their place.
Choose the right glue
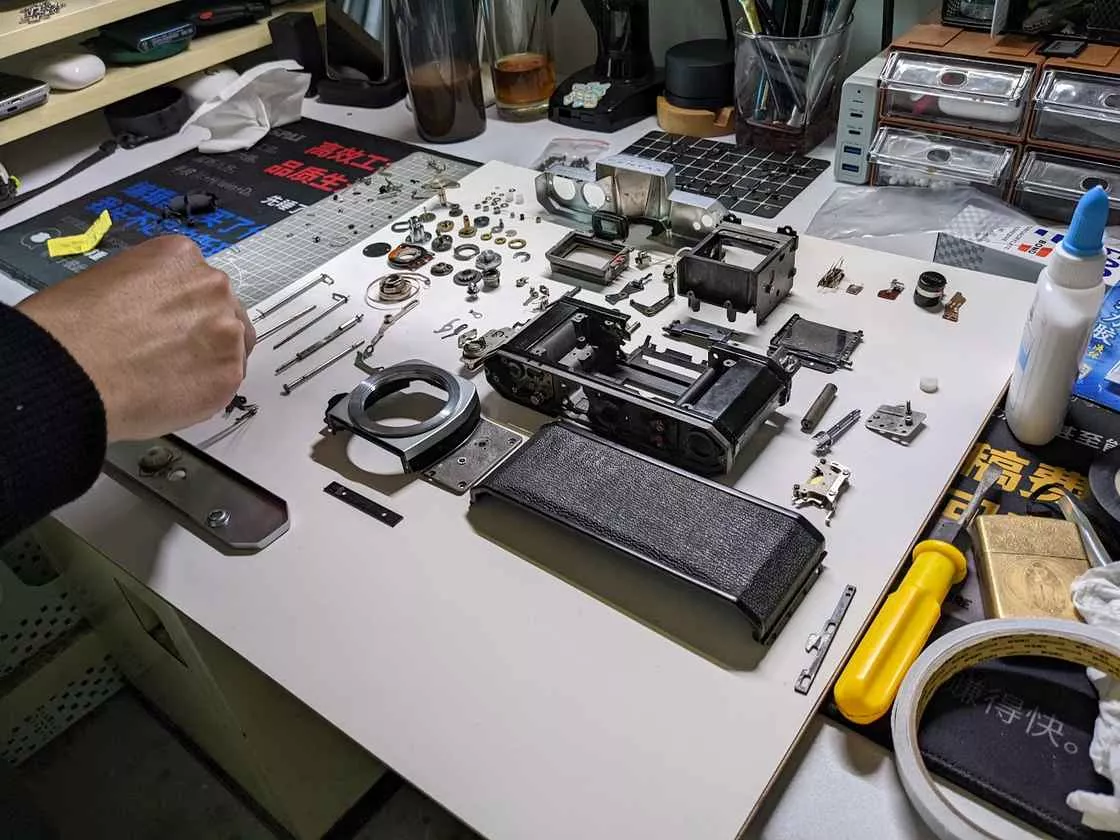
As mentioned earlier, trying to arrange all these different sizes and dimensions of screws and parts neatly according to the draft drawn in advance and keep them where they should stay without shifting is a difficult task. Especially the process of picking the parts up and applying the glue, because one of the contact surfaces of the parts is already glued, and that leaves less contact points, making the parts prone to grip poorly.
Parts like metal rods and screws have a relatively small contact surface for glue, and after a few experiments I found that the AB Glue can firmly bond metal parts to the paper surface for smaller contact surfaces. And AB glue does not soak through the backing paper like 502 or other liquid adhesives, so it is very friendly to those who have OCD. And for larger parts, similar to removing a large body, top cover, bottom cover, etc., choosing to use foam adhesive will better dip them together while dropping some 502 inside the seam to ensure these large parts don't come off.
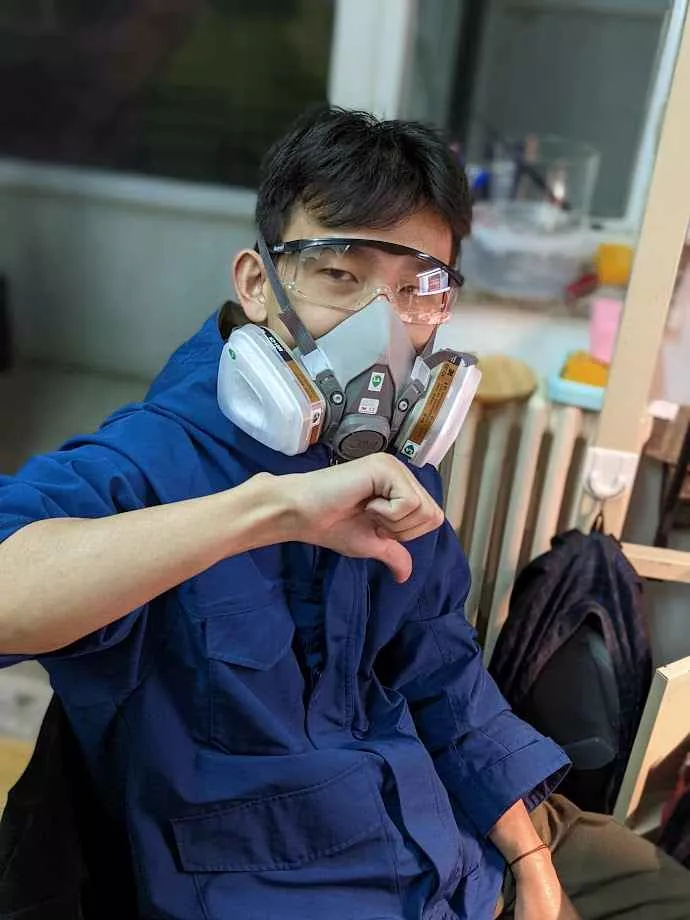
However, the smell of AB glue after mixing is very pungent and smoky to the eyes. I didn't have good protection during the first half of gluing the parts, so I inhaled too much pungent gas and got dizzy and hurt.
 My eyes have gotten lost
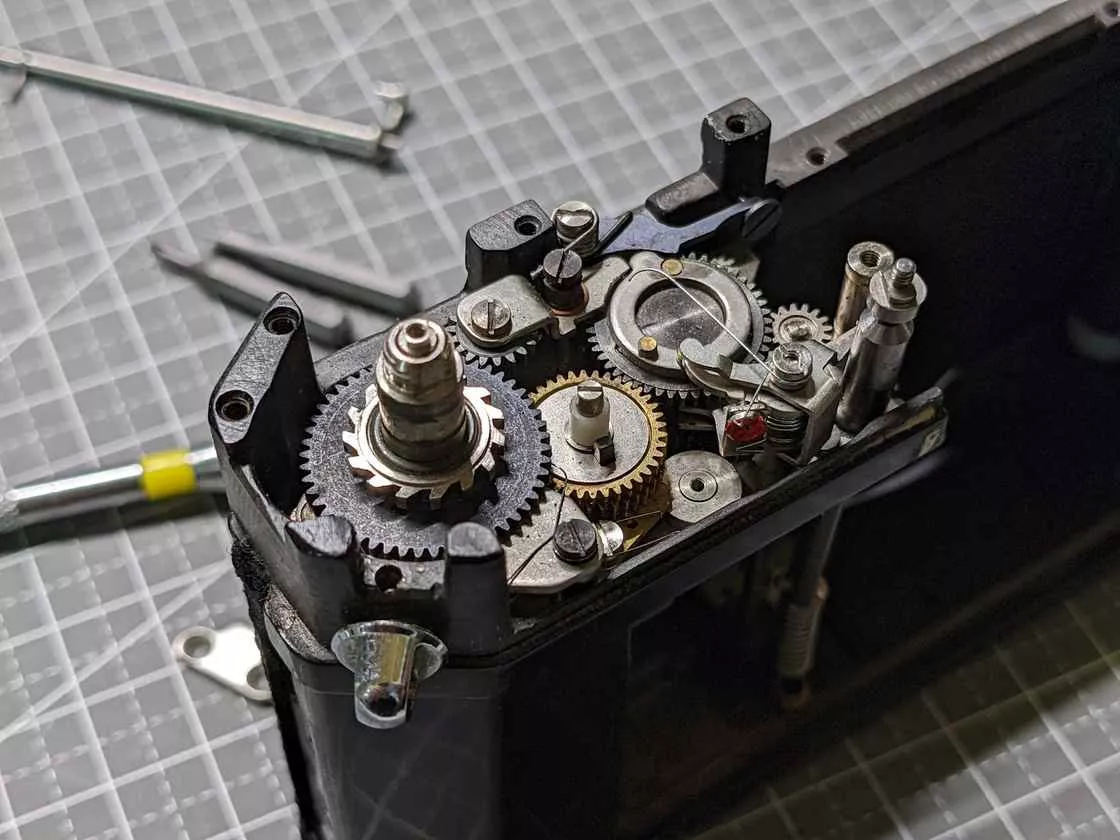
Some interesting parts
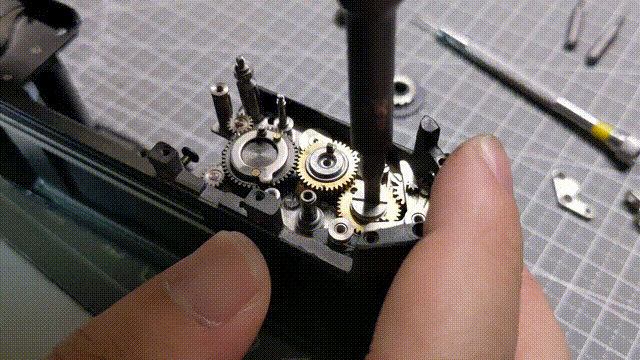
Time lapse photo component for cameras
 This sound is especially good, when will GIF pictures have sound (maybe GIF pictures with sound are called videos) gear
 Final product
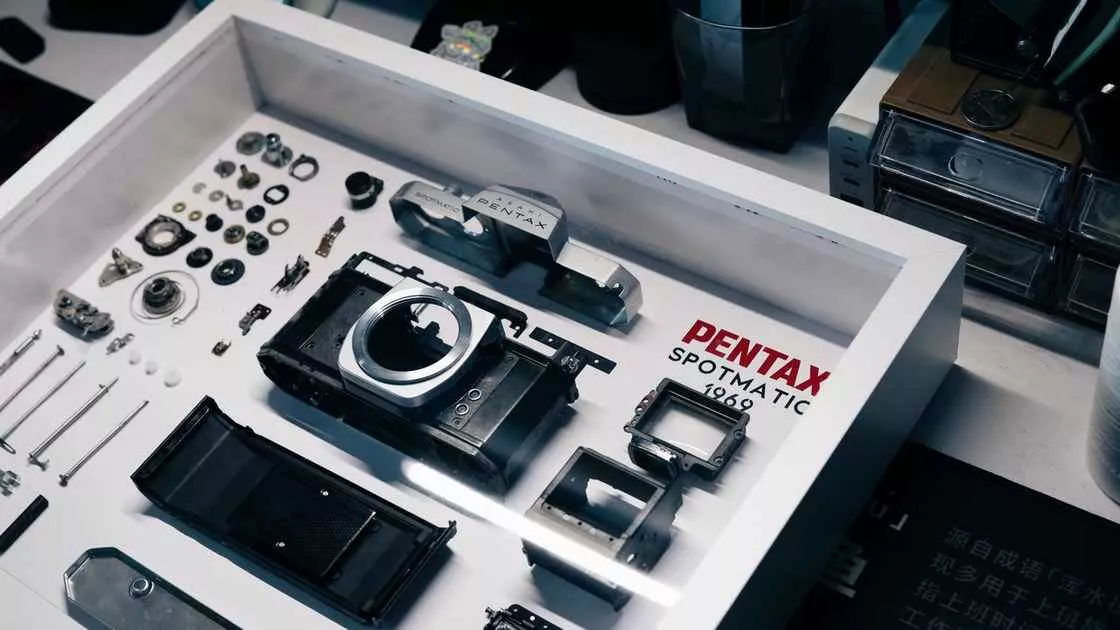
 The whole disassembly + framing process was really challenging for me, and the overall line of work was so long that it dragged on. But the moment the parts were assembled, the joy and sense of accomplishment of completion was really incomparable. The moment it was finished, it suddenly felt like this fifty year old Pentax had been reborn and had begun to shine in a different place. Although it is too old to be photographed, I hope that by re-mounting these old cameras, I can make their history known and remembered by more people from this moment onwards.
Films never die.